Google’s Demand Gen Campaigns (short for “Demand Generation”) are designed to reach new customers across YouTube, Discover, and Gmail — with visually rich, scroll-stopping ads. These campaigns help you generate demand by combining Google’s AI with creative storytelling.
In this tutorial, you’ll learn how to create a Demand Gen campaign in Google Ads, step by step — even if you’re new to the platform.
✅ What is a Demand Gen Campaign?
Demand Gen campaigns are built for mid-funnel marketing, where you’re targeting people who may not know your brand but are likely to engage. These ads are shown on:
- YouTube (Home & Watch pages)
- Gmail (Promotions tab)
- Google Discover feed (on Android & Chrome)
They combine video, image, and carousel formats and rely on Google’s AI for placements, bidding, and optimization.
✅ When Should You Use Demand Gen Campaigns?
Use Demand Gen campaigns if you want to:
- Increase brand discovery
- Promote new products or offers
- Drive traffic and engagement with visually rich creatives
- Reach people similar to your existing customers
🛠️ How to Create a Demand Gen Campaign in Google Ads
1️⃣ Log in and Start a New Campaign
- Visit https://ads.google.com
- Click on + New Campaign
- Choose Create a campaign without a goal’s guidance (for full control)
- Select Demand Gen as your campaign type
2️⃣ Choose a Campaign Subtype
Google may give two options:
- Conversions – Focused on actions like leads or sales
- Website traffic – Great for top-of-funnel traffic
Choose the one that aligns with your goal.
3️⃣ Set Campaign Settings
- Campaign name – Something clear, e.g., “Product Launch – Demand Gen”
- Bidding – Choose Maximize conversions or set a Target CPA
- Budget – Set your daily budget (start with ₹500–₹1,000)
- Location & Language – Target specific countries, cities, or regions
- Devices – Usually leave it as “All devices”
4️⃣ Select Audience Targeting
This is where Demand Gen shines. You can target:
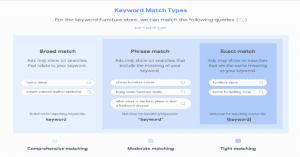
- Custom segments (people searching for specific keywords or URLs)
- Lookalike audiences (based on your existing customers or converters)
- Affinity & in-market segments
- Your remarketing lists (website visitors, YouTube viewers, etc.)
👉 Tip: Start with custom segments for more precise targeting.
5️⃣ Create Ad Groups and Choose Format
You can choose from 3 formats:
| Format | Best For |
|---|---|
| Single image | Product ads, branding |
| Carousel | Multiple offers or features |
| Video | Brand storytelling, tutorials |
Google also allows multi-format ad groups that automatically optimize across image, video, and carousel.
6️⃣ Upload Creatives
For best results, upload:
- At least 3–5 images (1200×628, 1080×1080)
- 1–2 videos (10s–30s, YouTube-hosted)
- Headlines (30 characters)
- Descriptions (up to 90 characters)
- Final URL (your landing page)
Make sure all assets are high-quality and mobile-friendly.
7️⃣ Review and Launch
- Preview your ad in different formats
- Double-check your audience, bidding, and creatives
- Click Publish
Your campaign will go live after review (usually within 24 hours).
🔍 Tips to Maximize Demand Gen Performance
- ✅ Use short, eye-catching videos (under 30 seconds)
- ✅ Test different creatives and headlines
- ✅ Monitor performance in Google Ads → Campaigns → Assets
- ✅ Optimize based on engagement and conversions
- ✅ Use audience signals to help Google’s AI learn faster
🚀 Final Thoughts
Google Demand Gen campaigns offer a powerful way to connect with potential customers before they’re actively searching. They combine visual storytelling with smart AI targeting, making them ideal for brand awareness, product launches, and engagement.